

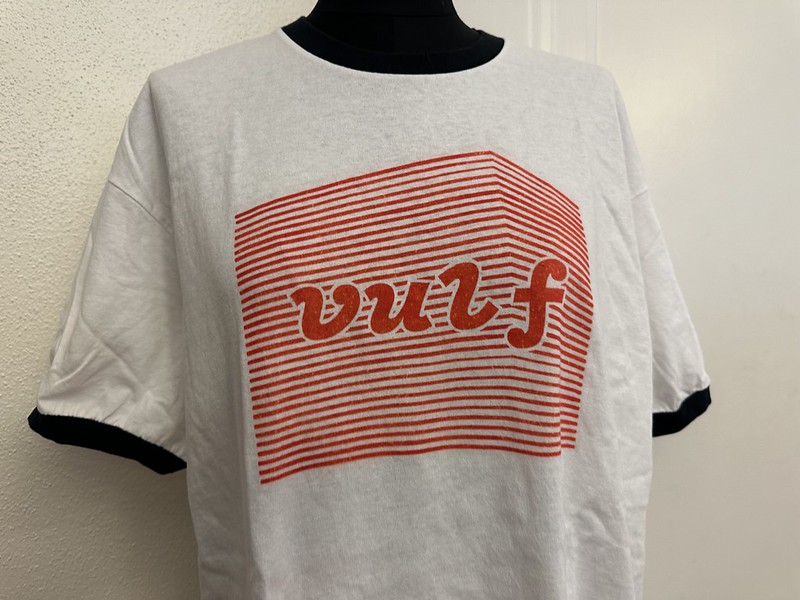
I've been hankering to make my own rendition of the Blue Velvet t-shirt I had in the '90s and a new incarnation of the infamous Robert Watts/Products for Implosions // Vivienne Westwood/Malcolm McLaren Seditionaires "tits" tee (link & link).
As luck would have it, I have 3M transparency sheets, an HP Laser Printer and access to lots of Florida sun.
I've also been able to utilize the artwork I've made for other projects and print transparencies to use with the SolarFast dye. Bonus!
The basic concept of the SolarFast dye is to brush it onto the t-shirt with a foam brush or a paint brush in a room protected from UV light sources (daylight, incandescent bulbs). If you use a paint brush, you will likely see brush strokes in your final work unless you take care to fully saturate the t-shirt with the Solarfast dye. The Jacquard website is your first resource for tips, tricks and general instructions.
Notes I've picked up along the way are:
- You can thin the SolarFast down with water to a 1:1 ratio without losing more than 10% of the final color vibrancy.
- The 1:1 ratio can be used in a spray bottle to spritz the tshirt in preparation for sun exposure. This worked ok, but I prefer the control of a paintbrush.
- I've used my Cricut to cut a mask for the shirt using the Reynolds Freezer Paper stencil method. This keeps the area where I'm applying the SolarFast constrained to only the shape that needs the dye. Lots of tutorials show the person painting a big square of the dye but only exposing a small area of this dyed fabric to the sun. My goal is to mimic a silk screen effect and only lay down SolarFast where it really needs to go. This will also reduce the amount of area you need to wash the unexposed SolarFast from once your garment is ready to wash.
- Pouring the SolarFast into a bowl and using a small paintbrush is the easiest method to paint your fabric with SolarFast.
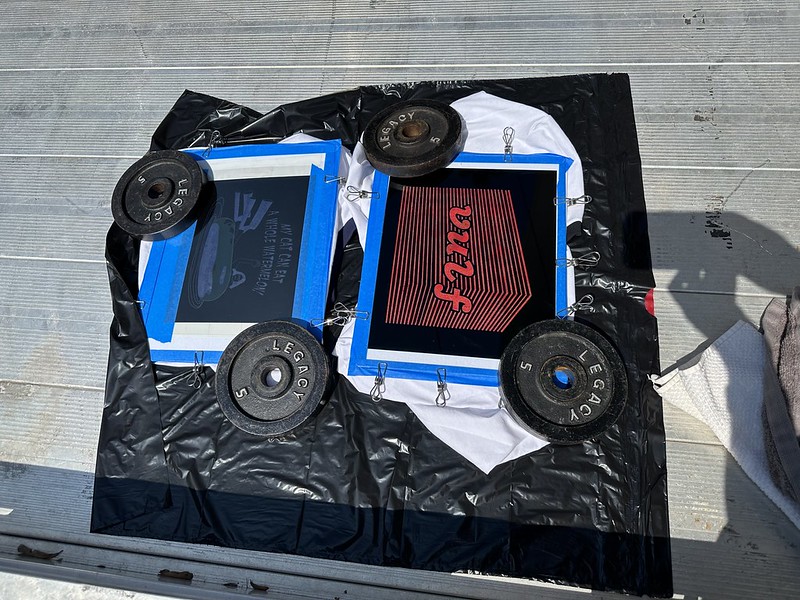
- I've made good use of last year's corrugated plastic campaign signs as backing boards to clip the shirt to and used a piece of cardboard inbetween the front and back of the shirt to keep the SolarFast from bleeding through to the back of the shirt.
- When you're preparing your images for printing on the transparency sheets, use registration marks outside the boundary of your artwork to align your two prints quickly and easily. Using two transparency prints will give you a fully opaque negative to get greater contrast in your SolarFast prints.
Below are photos of the application of the SolarFast dye, placement of the transparency, the exposure process and the final product.

No comments:
Post a Comment