Showing posts with label Site Survey. Show all posts

Friday, June 7, 2019

What Is A Predictive Survey?


It would seem that somewhere along the line the rumor got started that predictive surveys are magical, mythical things that are conjured out of thin air by the power of an 'easy' button.

If I had a nickel for every time I've had to level set someone's expectations on how long a predictive survey should take, could take or will take; the stack would be pretty high.

I made an informational video explanation on what a predictive survey is and the difference in the length of time to define all of the RF obstacles when the wireless engineer has a CAD file of the floor plan vs. any other image file of the floor plan. The video is eight minutes long and has a disclaimer at the end for all the YouTube people that feel the need to tell me what I left out, or how I didn't explain it right (according to them).


This video is not intended to be an all-encompassing explanation of all of the phases of a predictive survey. The content is solely my opinion. Do not attempt to perform a predictive survey without having attended an Ekahau training class, preferably the Ekahau ECSE Design course. Any and all images used retain the copyright of the original creators.

Thursday, June 26, 2014

Wireless Site Survey Rigs (a repost)

Site Survey Rigs

(an archive of my CWNP post)

By Jennifer Huber On 03/01/2011 - 3 Comments
I’ve been traveling to customer locations to perform wireless site survey work for over four years now, and I can assure you traveling with survey gear can be somewhat tricky, especially if you’re like me and want to avoid checking your bags at the airport. I’ve seen many a survey kit arrive in pieces as a result of the thorough TSA checked baggage ‘screening’. As a result, I’ve come up with some fool proof ways of flying with survey gear stored in my carry-on luggage, while doings so in a way that I’m not holding up the TSA security checkpoint line. 
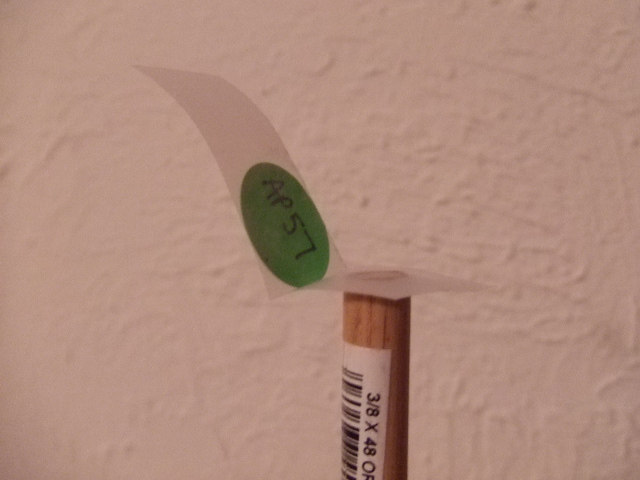
The gear I carry with me to do an active site survey is a Tessco battery pack, a Cisco 1140 access point (or a Cisco 3500 CleanAir access point), a roll of duct tape, colored ½ inch stickers, a Sharpie, a roll of transparent tape, and the mounting bracket for the 1140/3500 access point. The mounting bracket uses the metal mounting bracket that ships with the 1140/3500 series access point and a wooden block threaded for a painters’ extension pole. The wooden block was at one time a drywall texture brush.

I removed the bristles with a pair of pliers and then spray-painted the wood block gloss black to look more professional.


A pair of Mr. Longarm Angle Adapters allow me to suspend the 1140 access point from the wooden block bracket as if it were installed on theceiling.


I have seen someone use a plastic backed drywall texture brush as their mount for an 1140 bracket, but I don’t have a dremel to grind down the plastic mount to allow for the bumps on the back of the 1140 flat metal bracket.

Those are the basic parts I need to perform an active site survey at the customer location.
Before I discovered Ziploc XL bags at Home Depot I had to pull out the access point and power supply and put them in a bin, and now I use one of these gigantic bags to carry all the survey gear. I can zip open my carry on suitcase and lift all the survey gear out and put it in an x-ray bin in one swift movement.


Since a survey cart is too large to count as carry on luggage, and often don’t have enough early warning about a site survey to ship anything to the site, I’ve had to make do with things that wouldn’t normally pass as a survey cart.  The customer sometimes will have an A/V cart or a utility cart that I can use to survey with, but sometimes I have to be a bit more creative.  I’ve made do with items you wouldn’t normally imagine passing as a cart for surveying. I use the following as examples: the survey kit pelican case, an office chair (works if it is a really small survey); a furniture moving cart, a furniture dolly, and sometimes I even had a proper Rubbermaid cart to use.


The things I can’t travel with are the Mr. Longarm 12 foot painter’s pole and a dowel rod. These items can be found at any Home Depot, and there has been a Home Depot within driving distance of every site I’ve had to survey. I use the dowel rod to attach the ¼ inch round labels combined with the transparent tape to the suspended ceiling grid to mark the access point installation locations.  I fold the transparent tape into an “L” shape and then stick the tape to the suspended ceiling grid.  This works much better for me than having to find and drag a ladder around with me so I can reach the ceiling to manually mark the access point installation locations.

Several other wireless engineers I’ve worked with have designed their own outdoor survey rigs by using perforated sheet metal strips and crafting survey tripods out of this held together with bolts and wingnuts.  I have also seen survey rigs for outdoor point to point feasibility testing crafted out of sections of PVC pipe.  PVC piping is very sturdy, disassembles easy, and can be used in a multitude of ways to create a survey pole or survey mounting structure.  My friend Jeff Russell has made an outdoor rig for doing a mesh survey from PVC piping, and an indoor tripod mount out of perforated metal (photo gallery at this link).


There are certainly a million different ways to craft a survey rig out of commonly available parts from your nearest hardware store.  The only limit seems to be your imagination. 

Thursday, January 24, 2013

Sometimes I think we're not speaking the same language!

Listening is a key skill for IT consultants, but I find myself more often trying to understand what the customer really expects when they say they need a 'site survey'.

A 'site survey' can mean quite a few different things and there isn't a standards body to formulate and finalize standard descriptions of site survey terms. 

Active, passive, predictive, validation, simulated and budgetary are all words I've heard used to describe the type of site survey a customer wanted.

The first pieces of information I need to get are: 

  • Does the customer have an existing wireless deployment?
    • Do they want their current RF coverage documented, then augmented?
      • If augmentation is desired, existing access point power would need to be reduced to ~25mW before documenting the RF coverage
      • Augmentation may not be the best solution due to the potentially vast differences in their current access point hardware and antennas vs. the features available in today's access points.
    • Do they want to deploy a new wireless coverage design and disregard their current deployment?
  • What does the customer intend to do with their wireless infrastructure?
    • What types of client devices do they anticipate?
    • What kinds of applications will be used?
    • Is there the potential for high-density user counts? 
    • Is any level of real-time location tracking required? 
Each deployment is different as a result of the building type, building layout, client use cases and customer budget. There are a great deal of questions that need answers before you can accurately define the type of site survey the customer needs.

Defining the different site survey terms is often problematic. Everyone seems to have their own idea of what an 'active' or a 'passive' site survey means. These are the terms I use to describe site surveys:
  • Active (also known as AP-on-a-stick)
    • Digital floor plans are obtained and scaled to a known distance.
      • If the floor plans do not have a scale indicated, the scale of the drawings can be obtained by Google Earth measurements or by using a laser distance measurement tool when on site at the facility.
    • The RF engineer brings in the actual access point the customer will purchase, powers the access point with a battery pack and documents the coverage of the access point in the actual installation location with the site survey software of choice. The access point installation locations can be surveyed one at a time and then merged, or multiple access points can be surveyed at a time (depending on the hardware resources available to the RF engineer)
      • This type of survey will not give you accurate data on the RF noise floor that will be present once the final access point infrastructure is installed and operational, as there are a limited number of access points transmitting during the survey period.
    • A Spectrum analysis should also be performed to determine if there are any major fixed sources of interference present in the facility.
  • Passive (also known as validation)
    • Digital floor plans are obtained and scaled to a known distance.
      • If the floor plans do not have a scale indicated, the scale of the drawings can be obtained by Google Earth measurements or by using a laser distance measurement tool when on site at the facility.
    • The RF engineer walks the facility with the survey laptop detecting one or more SSIDs in use at the customer site.
      • The RF engineer may not have access to network credentials to authenticate the the customer's WLAN and would only document the RSSI/SNR detected by the site survey application.
      • If the RF engineer has network credentials to associate/authenticate to the WLAN, additional testing of throughput/load/voice quality could be performed at the customers request.
    •  Spectrum analysis should also be performed to determine if there are any major fixed sources of interference present in the facility.
  • Predictive
    • Digital floor plans are obtained and scaled to a known distance.
      • If the floor plans do not have a scale indicated, the scale of the drawings can be obtained by Google Earth measurements of the outside wall of the building, or by using known distances common to corporate facilities (doorways are typically 3 feet wide).
    • RF obstacles are drawn in the RF simulation application
    • A software model of the access point's RF coverage is used to place the access point at a given location in the floor plan drawing and predict what the coverage for that access point would be given the RF obstacles drawn by the RF engineer.
    • Once the desired coverage level is achieved, a bill of materials can be generated
    • NOTE: Predictive surveys are not 100% accurate and a post-deployment verification survey should be performed to ensure the desired coverage was achieved through the predictive survey process.
  • Throughput/load test
    • There are several methods to performing throughput testing (this list is just an example and is not all inclusive)
    • The RF engineer would associate/authenticate the wireless client to the customer WLAN with credentials provided by the customer.
    • The RF engineer would also need access to a wired port to do end-to-end testing from a wired client to a wireless client.
  • Voice quality test
Hopefully the more we all talk about the different types of site surveys and learn from one another about the words we use to describe them, we'll all encounter less RFPs/RFQs asking for validation surveys for wireless infrastructures that aren't installed in buildings that aren't built yet.


Wednesday, June 20, 2012

Site Surveying with the Motion Computing F5v Tablet

Lately I've been doing some research into different tablets/netbooks/handheld PCs for performing wireless site surveys. Ingram Technologies loaned me a demo unit of the Motion Computing F5v tablet PC and put it to use as a survey kit running AirMagnet Survey Pro along with Spectrum XT in a multi adapter setup. My goal was to see how long the internal battery would last, and to see if I'd experience any application crashes, slowness or anything out of the ordinary with a slightly tweaked demo unit. The only power adjustments I made to the F5v system power settings were to not turn off the display, hard drive or the USB nic while the tablet was running on battery power.

I secured the usb hub to the handle of the unit with narrow velcro strips (cut down from larger double-sided velcro) and used masking tape on the usb hub cable to keep it flat to the back of the unit. The stylus pen is stored in the underside of the unit handle, so Velcroing everything to the handle made it so I had nowhere to store the tablet stylus when I wasn't using it. 
I did some googling and came up with a halfway decent floor plan of a local mall where I was betting I'd wouldn't get stopped by security while I was testing out the F5v tablet.

I loaded up the maps into AirMagnet, set the scale and I was ready to start testing. The overall square footage of the public walkways totaled about 100,000 square feet for the 1st & 2nd floor of the mall, and the batteries on the F5v lasted about an hour and a half with AirMagnet Survey Pro and Spectrum XT running the entire time. Luckily the F5v's batteries are hot swappable and the battery has an external charger docking station available. I wish the screen was a bit larger since I could not see the Spectrum XT inset in the Survey Pro application while I was doing the survey. The Spectrum XT data was collected during the survey even though no major sources of interference were detected. Overall I was pleased by the performance of the F5v and I'm betting it will be a rugged site survey tablet to replace the IBM x201 I'd used for years.

Below are the survey images for the 2.4GHz and 5GHz frequencies of the SIMON WiFi wireless network in the mall in case you were curious about what kind of coverage you might get from "free" mall Wi-Fi. I tried to spot the access points as I was collecting the RF data, but I didn't see them at all on the first pass. Maybe now that I have the data showing where the hot spots are I might be able to find the installation locations.

1st Floor 2.4GHz RSSI
1st Floor 5GHz RSSI
1st Floor 2.4GHz SNR
1st Floor 5GHz SNR
2nd Floor 2.4GHz RSSI
2nd Floor 5GHz RSSI
2nd Floor 2.4GHz SNR
2nd Floor 5GHz SNR
I ran a few AirMagnet reports (overall by SSID, overall by AP, spectrum analysis report) on the data I collected to see what that would look like for a mall where every shop has its own wireless network. Naturally, many of the shops' wireless networks were configured to operate on channels 2, 3, 5, 9. This is fairly typical for multi tenant buildings of any kind. You can download an archive of the reports here.

Updated with Spectrum Analysis & Laptop Analyzer captures (here).
The duty cycle utilization was quite high due to all of the SSIDs contending for the same RF airspace. I spotted a microwave and an X-box, but no strange fixed frequency devices.
I did find it amusing that their signage for the open SSID isn't capitalized the same as the SSID being broadcast, and I spotted a couple of the APs providing the mall Wi-Fi (Proxim AP-700s) as I was leaving.

For future reference, this tablet had 4GB of RAM installed and I didn't have any issues with AirMagnet application slowness or hangs.

Tuesday, January 3, 2012

Vintage Terrwave Battery With A Bad Fuse

If you find yourself surveying with a very old version of this Terrawave battery pack and it is suddenly not charging, or only works when it is connected to the wall charger, the fuse in it may have gone bad.


Remove the main unit cover, and you will see a plastic housing with a glass fuse in it.  The glass fuse was broken, so I replaced it with a fuse I purchased from RadioShack (4/$2.00).  After replacing the fuse, the battery took a charge, and worked properly after obtaining a full charge overnight.


The symptoms I had were that the battery did not take a charge from the wall wart, and the wall wart did not show that there was a load on it.  The light stayed green - indicating the battery pack was not charging.


The battery pack would not power on an attached access point unless the battery pack was connected to wall power.

Friday, December 16, 2011

Using Adobe Acrobat to Find the Square Footage of a Floor Plan

I made this recording back in 2009 to show how you could use Adobe Acrobat Pro to scale a floor plan, and ultimately find the square footage of a given area.

More often than not, I'm faced with figuring out the square footage of a building layout with no scale indicated on the drawing. Adobe Acrobat Pro has a measuring tool built into the application. You can take any image file, find the scale ratio of the drawing, set the scale, then calculate the square footage of the floor area.

The measurement tool line in newer versions of Adobe Acrobat Pro is a red line, instead of black, and it is easier to see the perimeter area you're drawing. Other than that, the video should help you get more out of an application you already have, but maybe weren't using for this task.


Saturday, August 20, 2011

AirMagnet Site Survey Pro Comparison to TamoGraph Site Survey

TamoGraph Site Survey


Back in June I received a license for the TamoGraph Site Survey application courtesy of Michael Berg from @TamoSoft. I told them I'd give the application a try and see how it compared to the features I was familiar with in AirMagnet Survey Pro.


I had done a previous compare/contrast with the Ekahau Survey application, but I did not have the TamoGraph software at the time to do a three way comparison.


Several months went by before I had a good indoor survey opportunity to use for the comparison of TamoGraph against AirMagnet. It has then taken me a couple of weeks to find the time to edit the Camtasia video and add a narration audio track to accompany the visual demonstration.


I used the TamoGraph Site Survey application to survey a smaller section of a much larger building  - just large enough to get some good survey data. Using the TamoGraph application was pretty straight forward. The first step was to load the correct driver for my Proxim 8494 USB card for the TamoGraph application. This was as easy as clicking Help > Driver Installation Guide, and then choosing which wireless card I wanted to use with the TamoGraph application.


I did have some problems when trying to use the Intel 6200 AGN card, so I opted to do the comparison by using the same Proxim USB wireless card for both site survey applications.


Starting a new survey is done by clicking 'New Project', defining where you want to store your files, (next), choosing the environment type, choosing measurements in feet or meters and choosing to extrapolate the data beyond the guess range of _X_ feet/meters. Then you choose the scan settings for the 2.4 & 5GHz frequencies (next), then load the floor plan image. The last thing you do before you begin surveying is to scale the drawing to a known distance. For this small demonstration I used a three foot doorway. It is advisable to use a longer known distance than a mere three feet. Using Google Earth can give you the outer dimensions of the building, or you can use a laser tool to measure an wall span within the building.
TamoGraph Site Survey Project Wizard - Environment Type
TamoGraph Site Survey Project Wizard - Scanner Settings


There are several requirements presets that you can choose from in order to determine if the current wireless deployment meets certain 'success metrics'. Each of these requirement presets can be edited and saved as custom presets.


The display options in TamoGraph site survey were very similar to those of AirMagnet. I am including screen captures for each of the applications' drop down menus below.
TamoGraph Visualizations
AirMagnet Menu
AirMagnet Menu (expanded)
There is the ability to change the AP detection and placement on the map. By default TamoGraph will approximate the AP installation location based upon the RSSI detected by the application. This location information is not always accurate since RSSI can fluctuate a bit.


The version of TamoGraph I was using (ver 2.0 Build 44) has a known issue with displaying the manufacturer name of newer Cisco access points. The non-identification problem was caused by the fact that their MACs begin with 88:F0:77, an OUI assigned by IEEE to Cisco very recently. This OUI was missing from the list of OUIs that comes with TamoGraph. The new file will also be included in the next TamoGraph release. Also, the ability to list the AP name will be included in the next release of the TamoGraph Site Survey application.


In order to work around this - I placed the APs exactly where they were located by standing directly under an AP and watching the AP list to see which AP had the strongest signal strength. Then I could place the location of that AP exactly.


Pausing the survey is not possible, instead you simply stop collecting data by clicking the stop button, and then begin collecting data again when you're ready to do so. This is essentially the same as pausing the survey, but just going about it in a different manner.


The survey data looked different from AirMagnet (naturally), but the actual RSSI and SNR values that were detected by each application were the same. There were some things I would have to get used to that the TamoGraph survey accomplished differently. Such as pausing/stopping the survey, having to select the APs you want included in the reporting, and the inaccurate auto placement.  I think if I were to use TamoGraph as my main site survey tool it would suffice for collecting RSSI and SNR data, but I would most likely turn off the auto AP placement.


The display option of  'AP Coverage Areas' looked a little strange to me, and perhaps it would make more sense if the area I was surveying wasn't covered by so many different APs. It seems that the coverage cell for a given AP is indicated as a colored line on the map. I'm not sure if this display would be useful in a densely populated RF environment, but it was an interesting RF display map. It reminded me of some Visios I had to create for a customer once upon a time.


The new features that will be available in TamoGraph Site Survey 2.1 are listed here. According to this information the ability to do predictive planning will be available in a few months.


The YouTube video I uploaded showing the differences between AirMagnet and TamoGraph is here:


The TamoGraph Site Survey application without GPS support is priced at $749 and with GPS support is $999. By comparison, the AirMagnet Site Survey Pro application is priced at $3995 including the Planner module and $1990 without the Planner module.


All in all, I was impressed by the features present in the version of TamoGraph that I worked with. I think that the RSSI/SNR data that was recorded within TamoGraph was just as accurate as that within AirMagnet. For companies on a budget, the TamoGraph application would be a worthy investment.

Thursday, June 9, 2011

Performing Passive Site Surveys with AirMagnet Survey Pro and Ekahau Site Survey

I've had the good fortune to receive a fully functioning (albeit limited to 90 days) license for the Ekahau Site Survey application. This is thanks to @Etherealmind meeting up with Jussi Kiviniemi from Ekahau at Interop. Jussi was in the Metageek booth at Interop to help showcase the Ekahau software suite and how it has been integrated to work with Metageek software/hardware. 


Thanks also to @SFoskett for recording the great video demonstration on the partnering between Ekahau & Metageek.


Starting off with what I know (because it is easier to explain what you already understand) I made a little video showing how I setup a map and perform a passive site survey of an existing wireless deployment. Naturally I'm expecting a similar functionality from the Ekahau Site Survey application. The only experience I have with the Ekahau application dates back to 2005 when I saw it used to do a passive survey of the hospital where I worked. I was not too impressed with the color charts used to represent the 'heatmap' of RF coverage. I thought that the color maps Ekahau used to show different areas of RF signal strength were not easy to understand, and showed the coverage with strange trapezoidal coverage boundaries.


I had to load a different driver for the Orinoco Proxim 8494 USB wireless card, but the Ekahau application had the drive it required as part of the installer. The installation was quick and painless, and then I had to set about figuring out an new site survey application. Starting a survey was pretty straight forward, but I did see that the survey data was collected quicker once I upped the 'wait time on channel' setting to scan quicker. There was a broadcasted SSID, so I was able to decrease the scan time and get survey data quicker as a result.


The things I don't know how to do with the Ekahau Site Survey application:
Show the SSIDs detected on the floor plan one SSID at a time
Show just the 802.11a or 802.11b/g coverage on the floor for each separate access point detected
Show only one data collection sample at a time. When I used the select/deselect options, the coverage map still showed on the floor plan. This might be because I still had the dropdown set to show the signal strength, but I can't be sure.


I did find the images from the site survey data from back in 2005. You can see what I was referring to regarding the coverage areas showing as large trapezoids. I think this must have been due to the team surveying not setting the granularity of their displayed data. Also I noticed that they didn't enter many of the patient rooms in order to gather RF data. When I'm doing a passive survey in a hospital, the only rooms I don't enter are the ones with the Isolation signage on the door.